📝 How to create a new invoice #
This page lets you prepare and send a professional invoice to your client.
Just follow these steps:
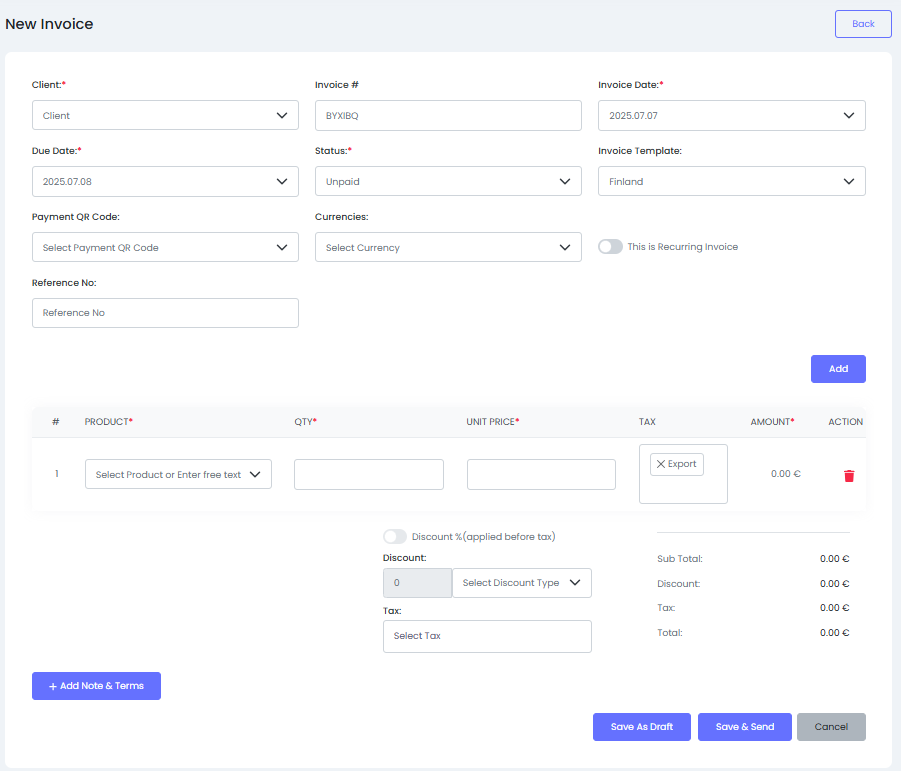
1️⃣ Fill in the invoice header details #
- Client:
Select the client from your existing list. - Invoice #:
This is automatically generated, but you can change it. - Invoice Date:
The date when the invoice is created. - Due Date:
When the client must pay by. - Status:
Usually set toUnpaidwhen creating. - Invoice Template:
Choose the style (e.g.Finland). - Payment QR Code:
If you have payment QR codes set up, select one. - Currencies:
Pick the currency for this invoice. - Reference No:
Optional extra reference (like PO number). - Recurring:
Toggle on if this invoice should repeat automatically.
2️⃣ Add products or services #
- Under the table:
- Product:
Select a product/service from your catalog or type a custom description. - QTY:
Enter how many units. - Unit Price:
This may auto-fill if you pick a product, or you can type it in. - Tax:
Choose the tax type (if set up). - The system will calculate Amount automatically.
- Product:
- Click Add to add more lines.
3️⃣ Apply discount or tax (optional) #
- Discount:
You can set a % discount or a flat discount.
Choose the discount type from the dropdown. - Tax:
Select additional overall tax if needed.
4️⃣ Add notes and terms (optional) #
- Click + Add Note & Terms to include payment terms or thank you notes.
5️⃣ Save or send the invoice #
- Save As Draft:
Keeps it without sending (for future edits). - Save & Send:
Saves and sends it to the client immediately by email. - Cancel:
Discards the invoice.
✅ Done!
You’ve now created an invoice.
It will appear in your invoices list where you can download, edit, or track payments.


